


You may know that I am a needlefish fanatic and you also may know that I love the color ‘parrot’; it’s a confidence thing. The rational part of my mind knows that the bass can’t be that “into” these two fluorescent colors—but the superstitious crazy old man in me believes in the color, so I use it a lot. I had been looking for a parrot colored Beachmaster Wadd for quite a while, but I could never get my hands on one. Well my good friend Keith came to my rescue last fall when he handed me a parrot Wadd and asked for nothing in return—yeah he’s a nice guy.
I know these plugs are considered collectible and that there are plenty of people who would have bagged that baby up and stored it for a future trade or just to look at—not me, I fished it that night. Much to my dismay, the plug began to split at the belly hole after only one or two trips! Let me set the record straight on something here; wooden plugs sometimes split—it doesn’t matter if it was made by a hobbyist, a small-time guy or a major manufacturer, odds are that someday they will have one come back cracked. I’ve heard stories from plug maker friends telling of irate customers spitting nails over a plug that split—even after a no-charge replacement was promised. The bottom line is that wood is just not all that stable and not every piece is the same; this means that they might have tiny growth cracks hidden within, certain pieces might not absorb the sealer as well as others, some might be extra dry or extra wet—these variables raise the risk of failure by a lot.
When a plug I use starts to crack, unless it practically splits in half (which I’ve only seen once), I will usually just fix it myself. I would say that about 99 times out of 100 the cause of the splitting is that the sealer is compromised. If you’re not familiar with how a plug is sealed, the basics are that the builder immerses the raw wood body in a bath of some kind of solvent-based sealer. The product is fluid enough to flow through the holes in the body and leave behind an impermeable coating that usually eliminates water intrusion which protects against splitting and keeps the wood from becoming waterlogged. Sometimes the barrier created by the sealer is broken accidentally during the assembly process and since the breach is inside the plug, the builder has no way of knowing. When the plug begins to take on water, certain woods swell which cracks the finish and sometimes the wood as well, it’s unfortunate, but not a reason to get your blood boiling. Here’s how I fix the problem.
First and foremost your plug needs to have plenty of time to dry out; I’m going to say a minimum of two weeks, hung up to dry somewhere (not in your plug bag!). You will need a few simple things to perform the repair: wire cutters, pliers, some epoxy, a pipe cleaner a small disposable cup and a small stick of wood—a coffee stirrer or a skewer will work fine.
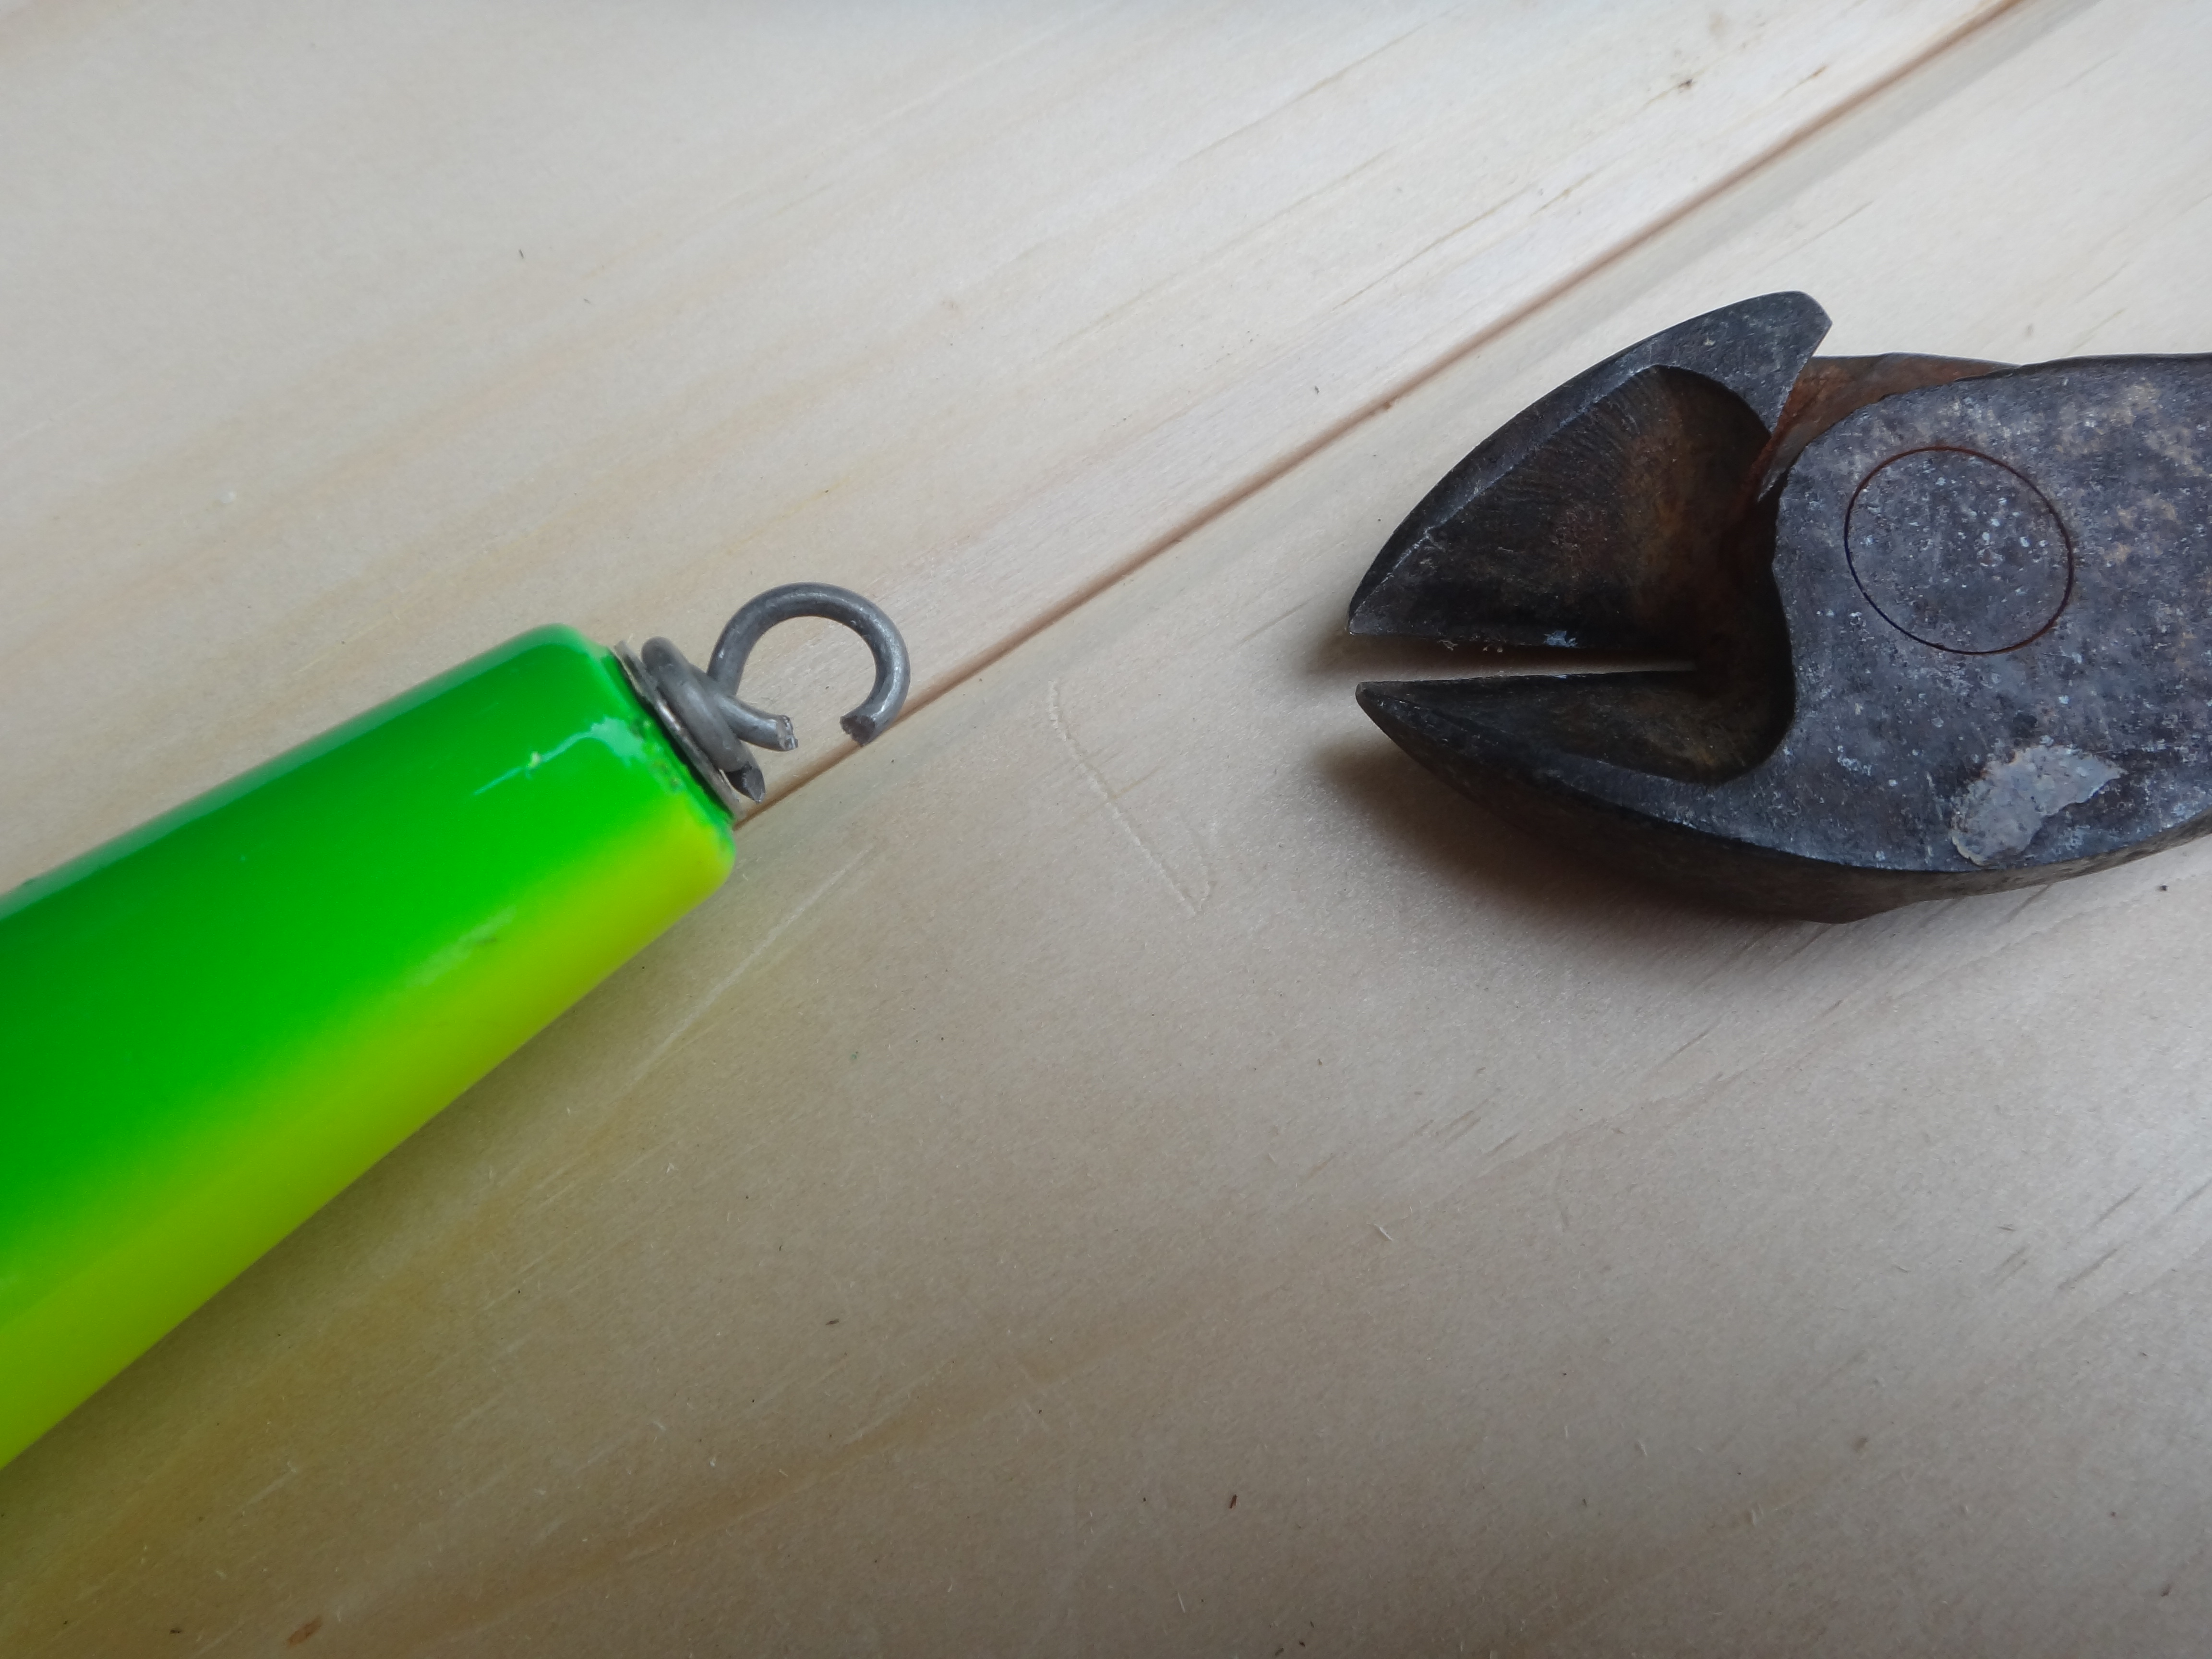
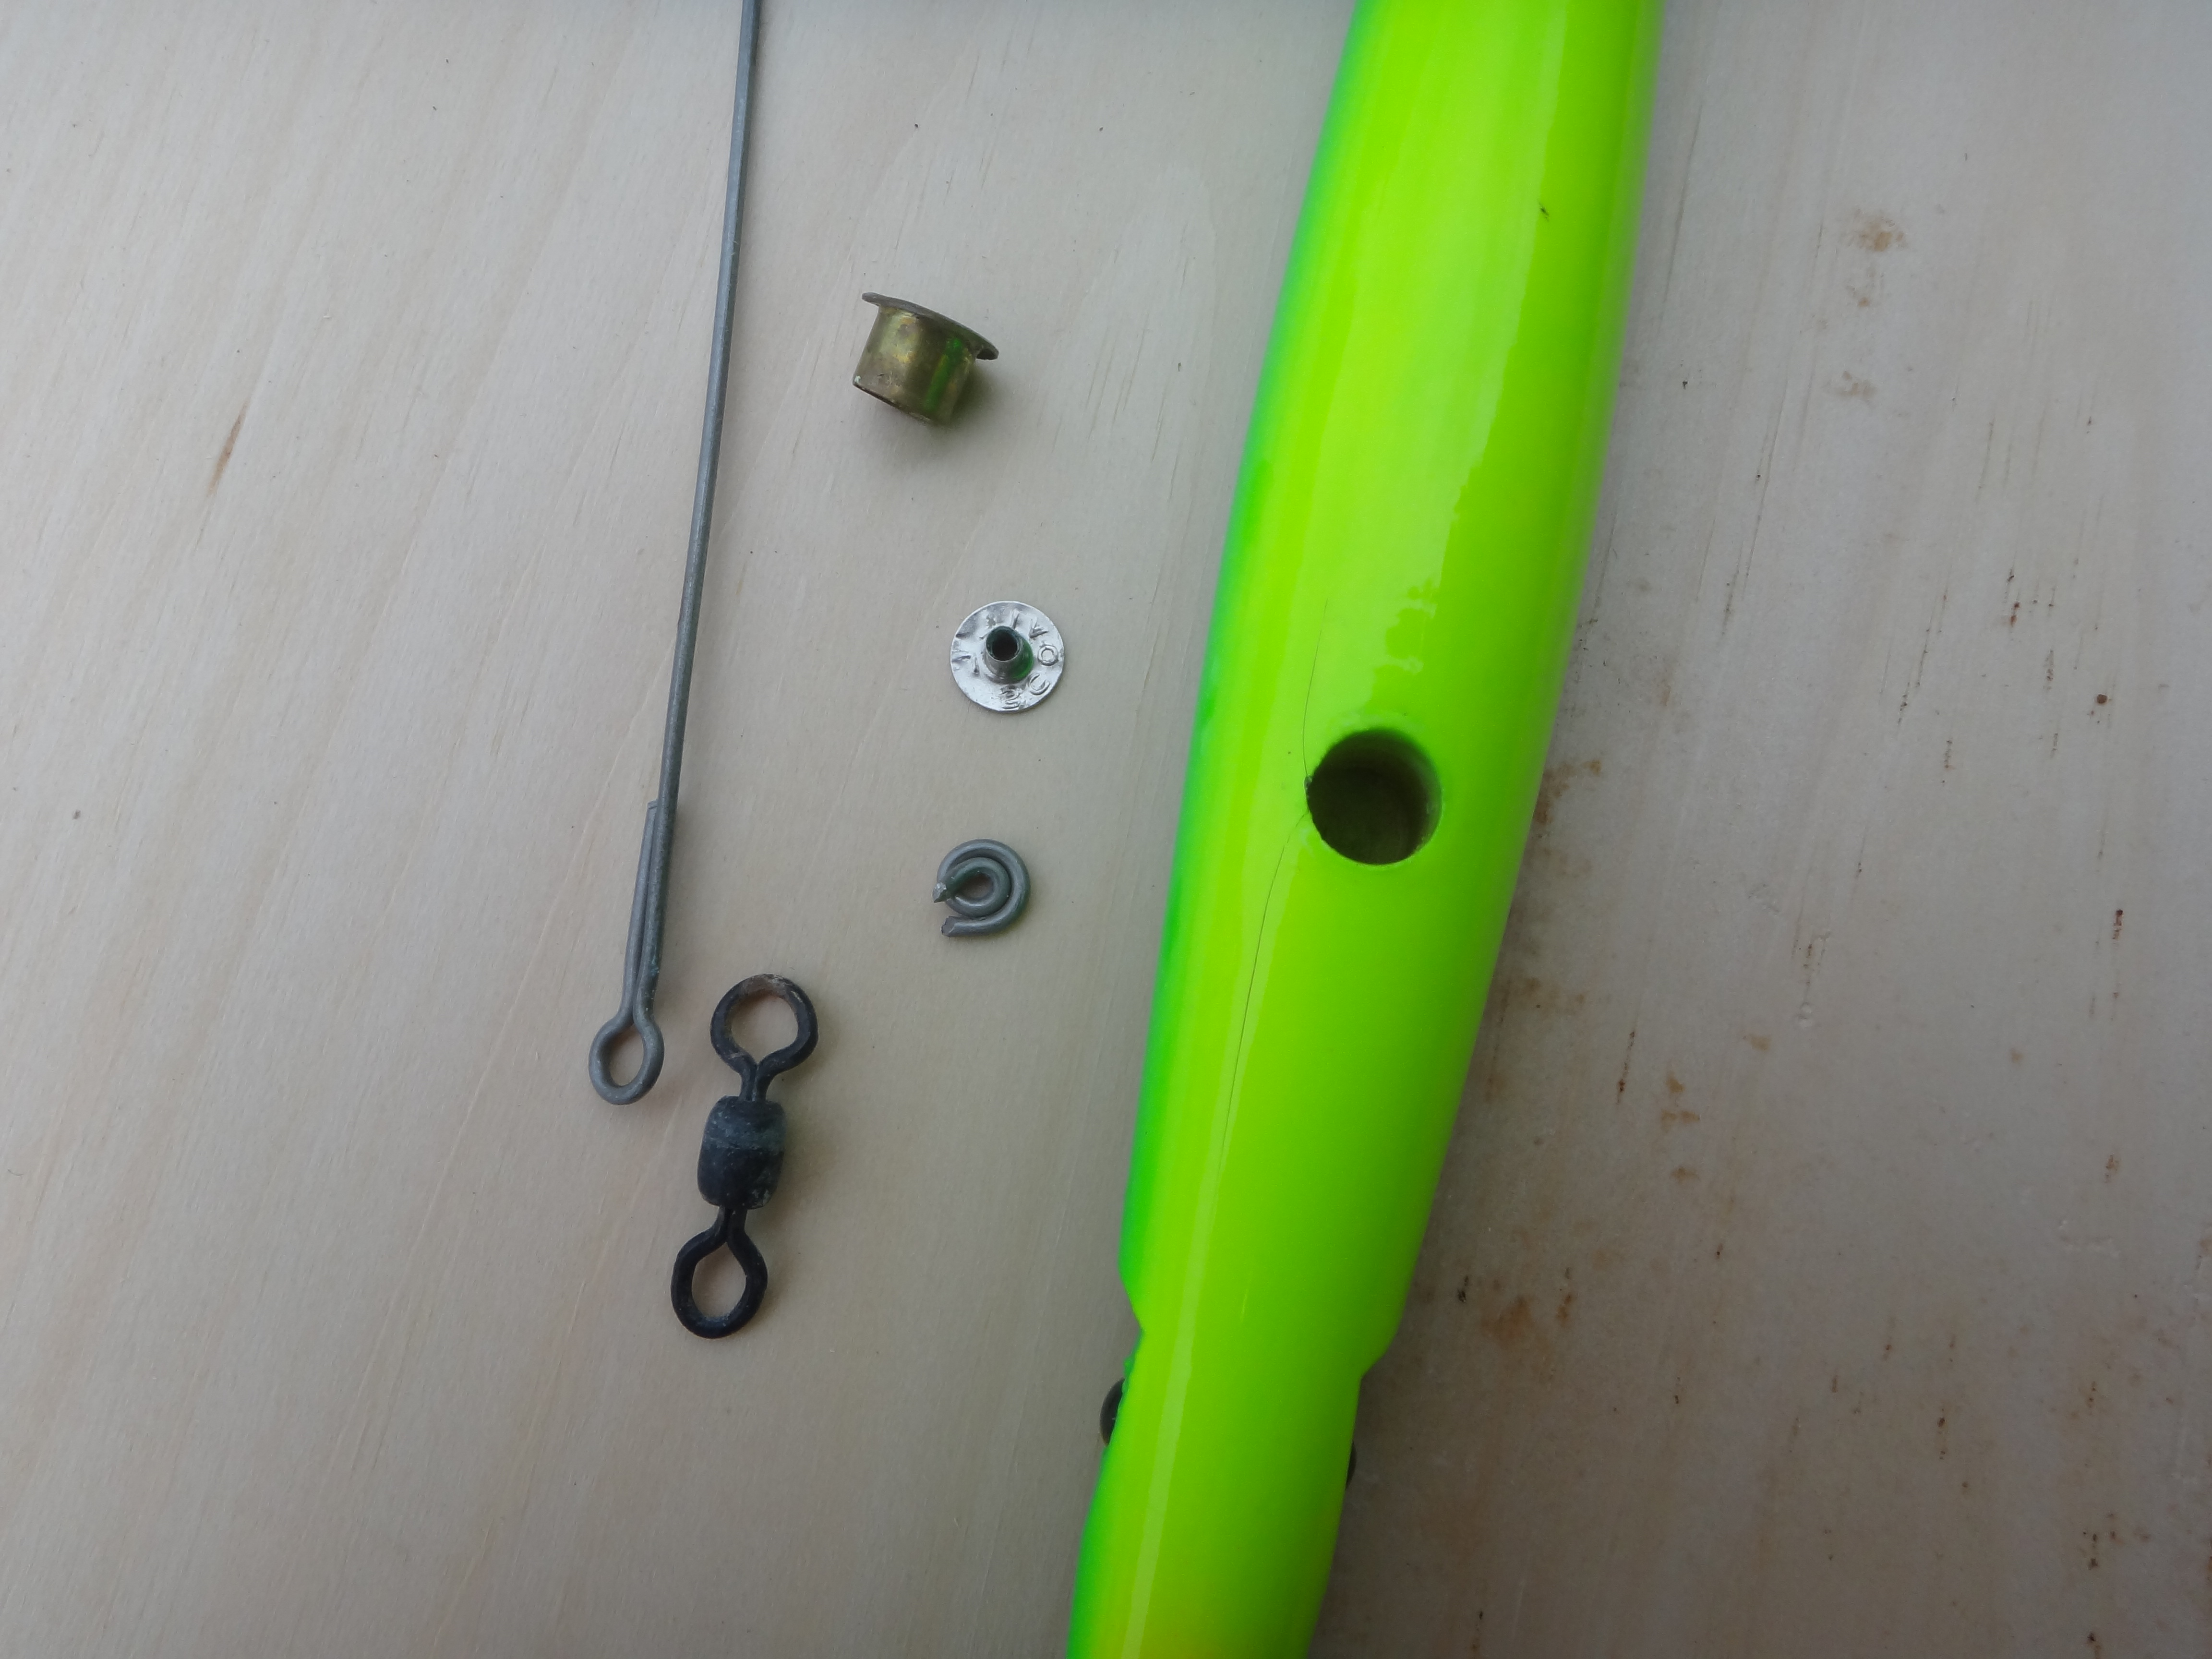

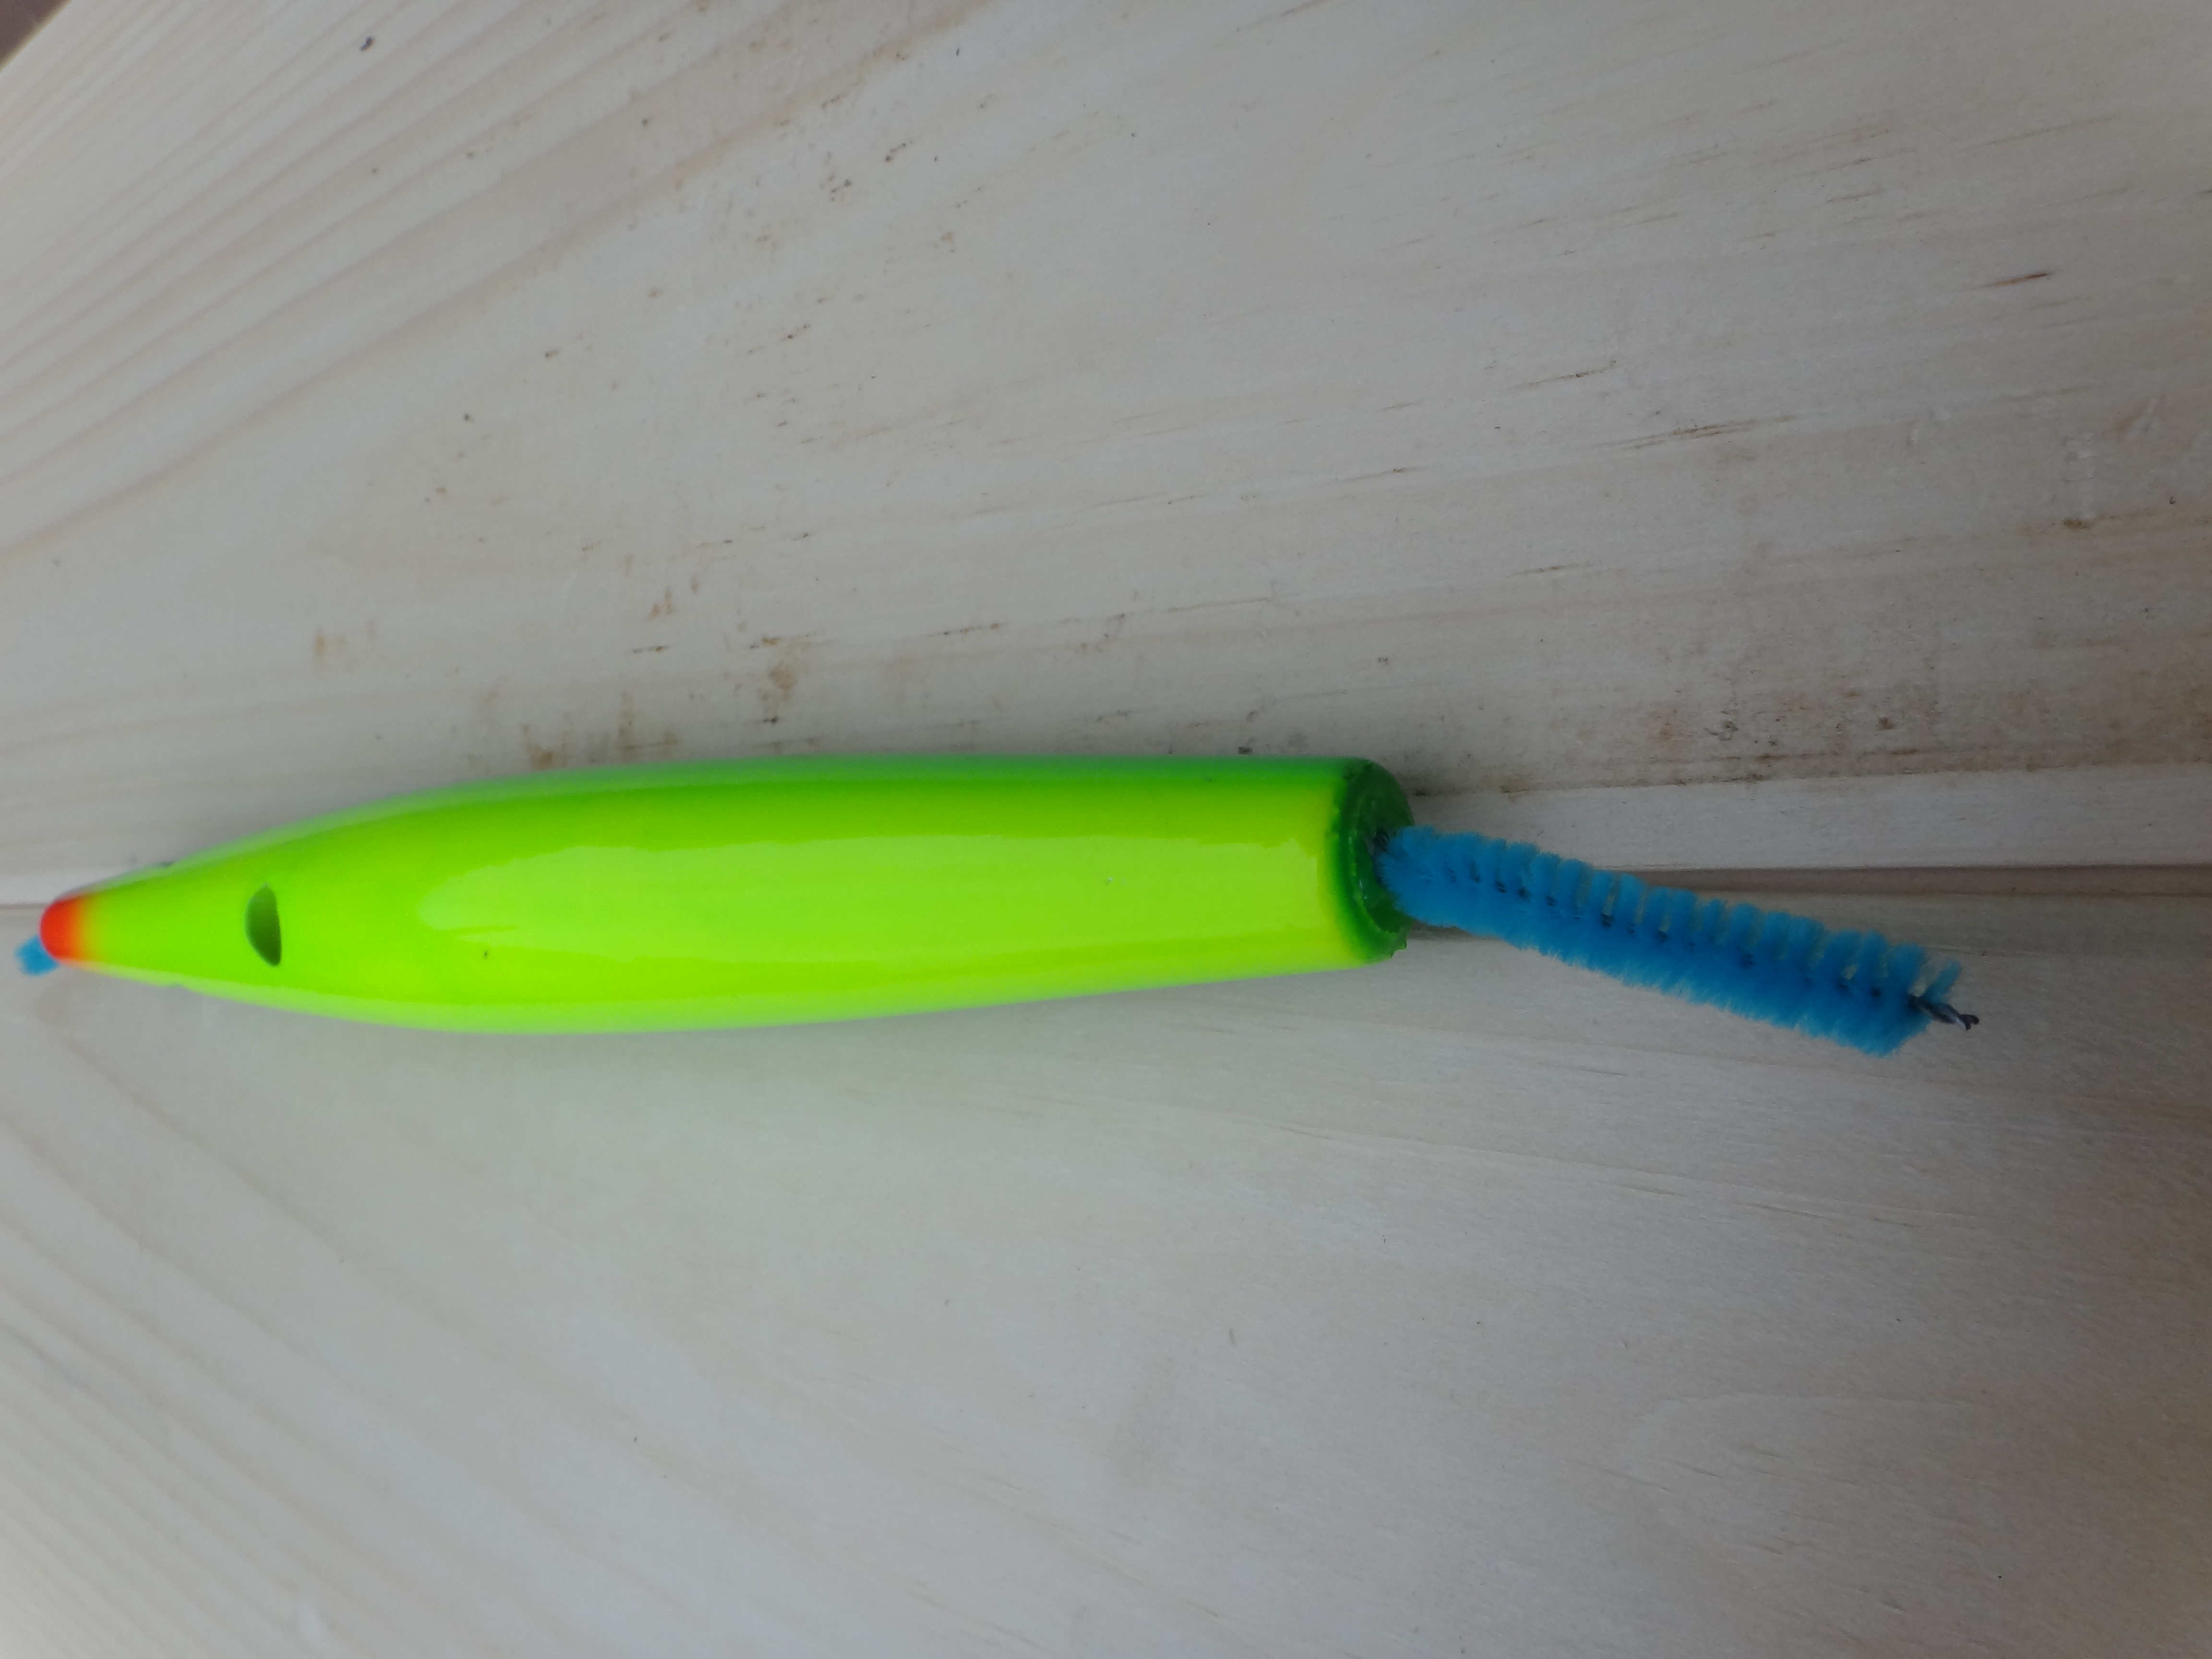
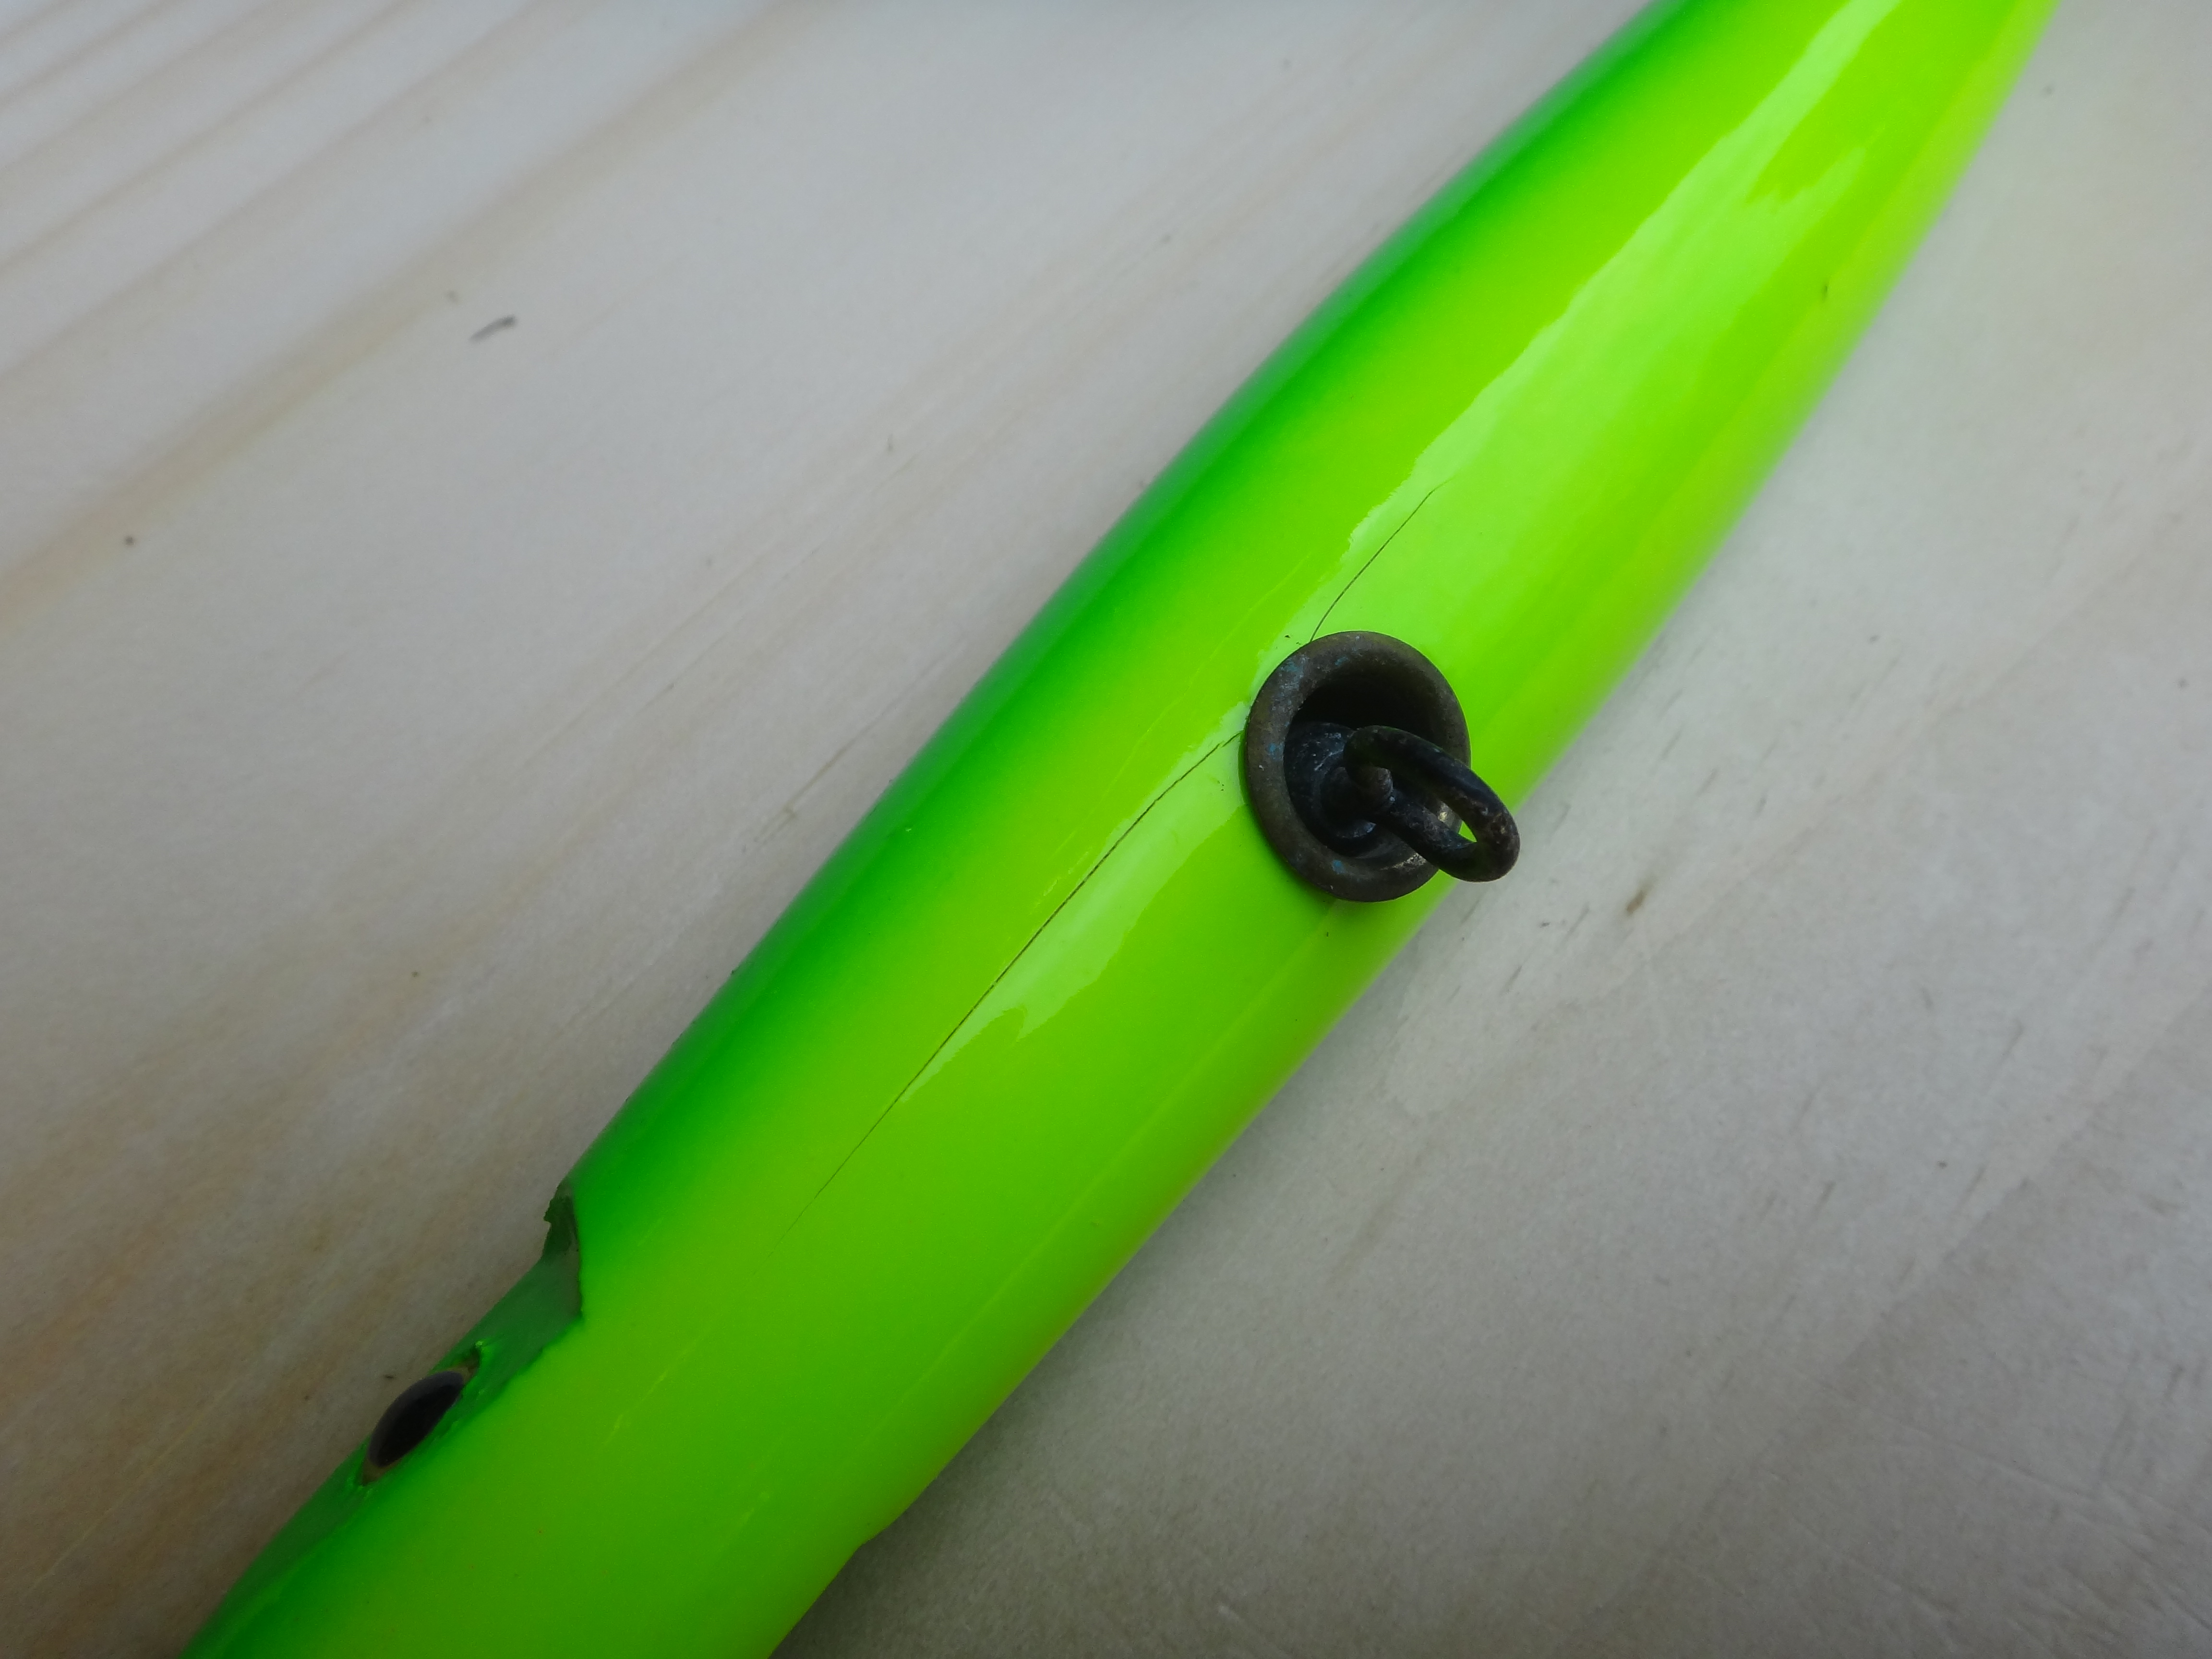
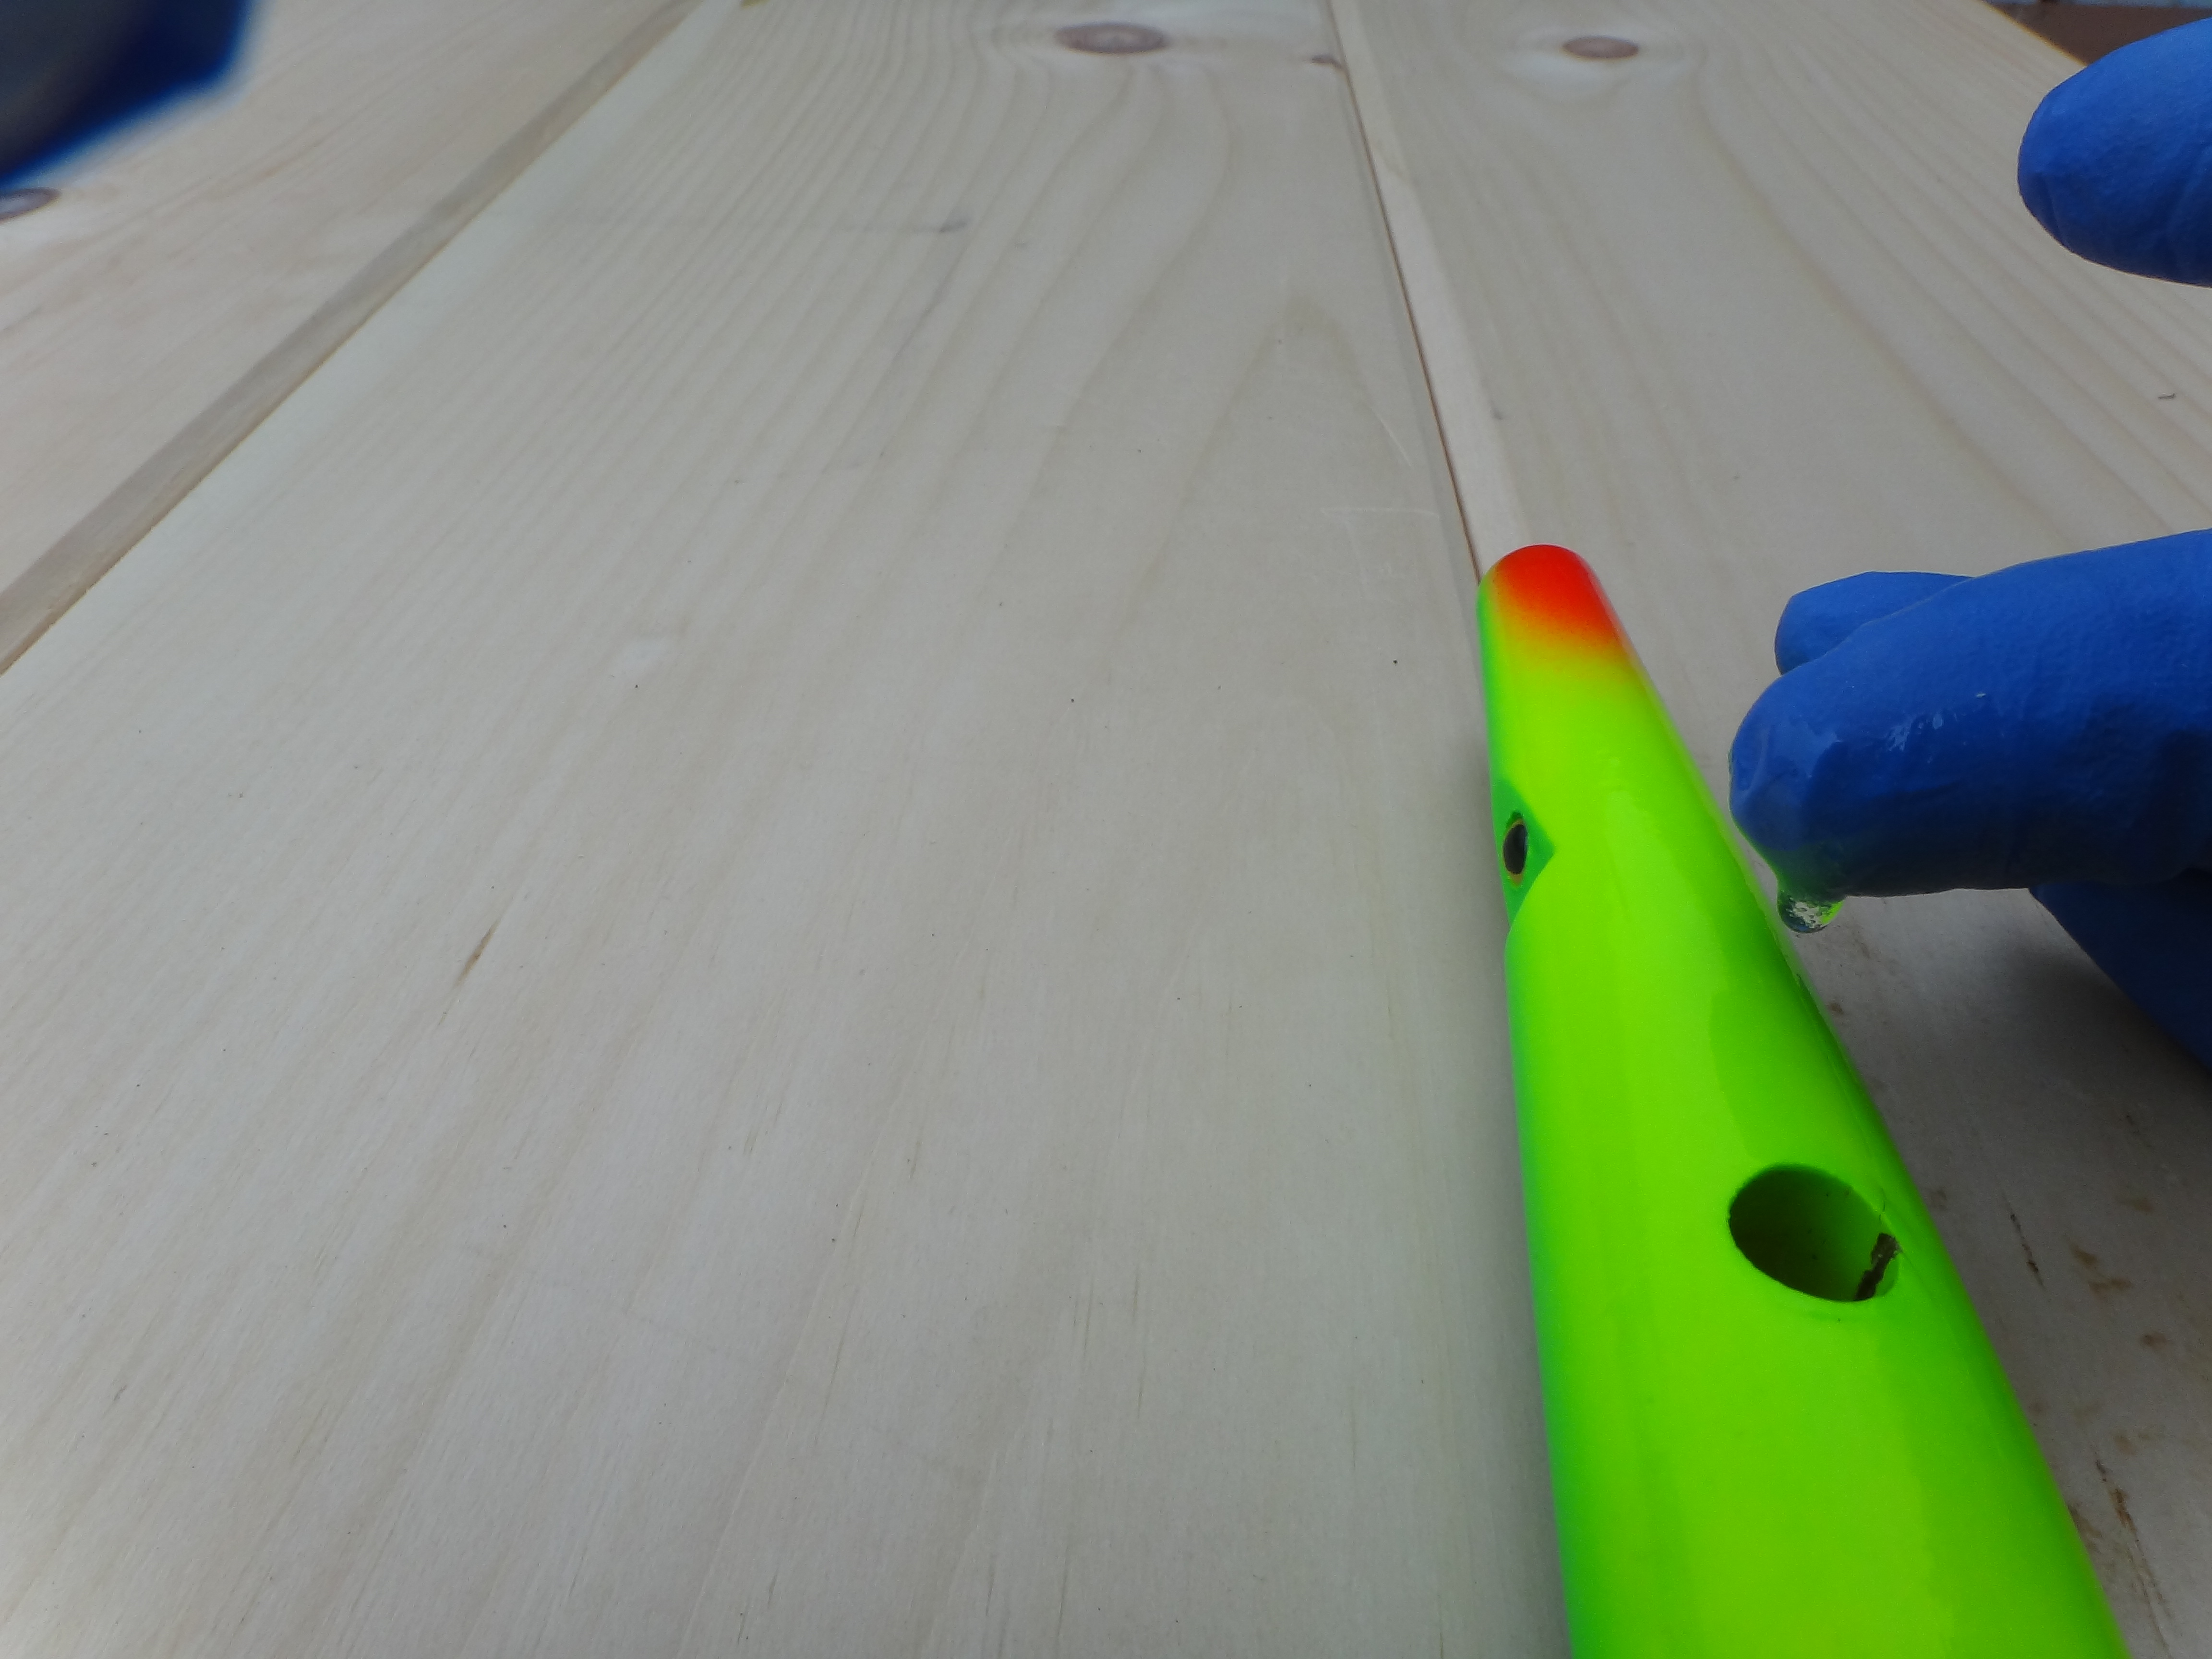
Step one is to remove the thru-wire. Simply cut the tail loop, straighten the end of the wire and pull it out. Then remove any grommets and the swivel. Now inspect the belly hole for a sealer breach, you can see in the photo of my plug that the grommet compromised the sealer. The next step sometimes requires a little finesse. You have to find a way to feed the piper cleaner all the way through the plug, sometimes you can just slide it right through, other times you might have to slide the thru-wire back into place and use it to pull the pipe cleaner through, you want to be able to grab both ends of it while it’s inside the bait.

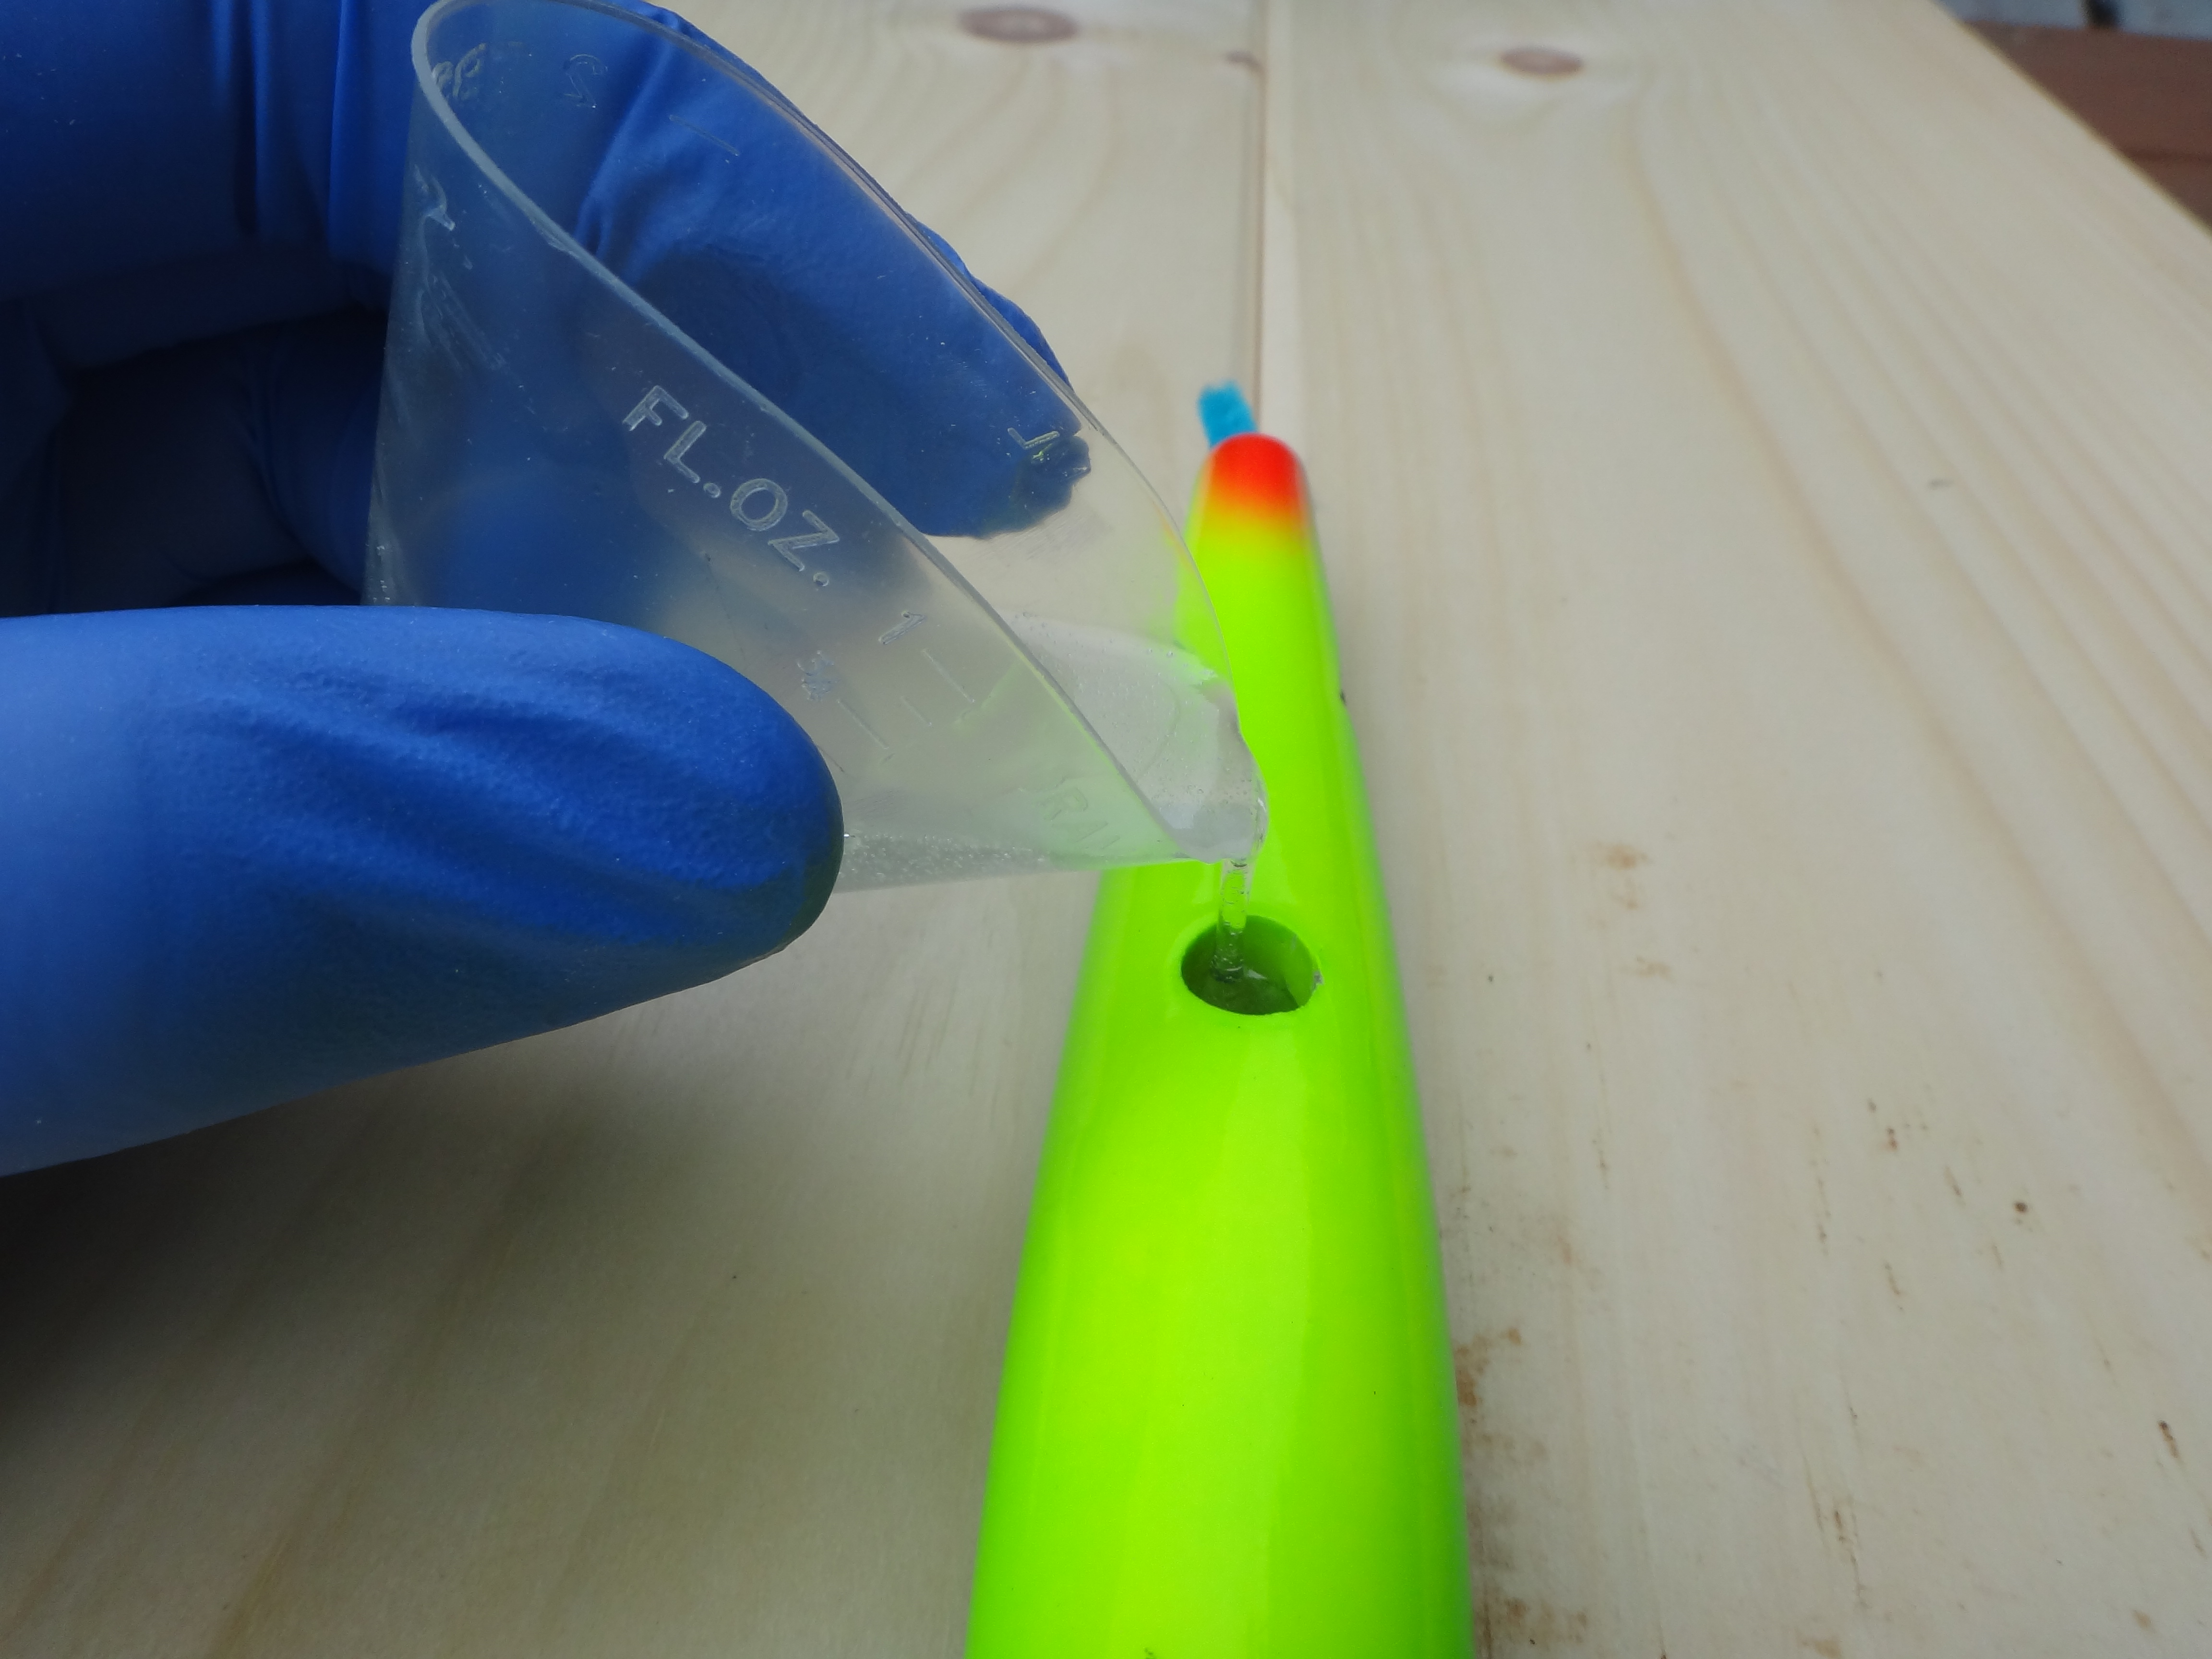
Now you have to mix up a small amount of epoxy, I would strongly recommend using a clear coat epoxy instead of two-ton epoxy and I wouldn’t even try using five minute. The reason is the viscosity, you want to use an epoxy that flows easily and that will stay liquid for more than a few minutes, once it starts to set up, it becomes very hard to work with. I used regular old Envirotex bar top epoxy for this example. Start by putting on a pair of disposable nitrile gloves and mix the epoxy well, then pour it into the belly hole, fill it up at least halfway. Now work the pipe cleaner back and forth inside the plug body, you’ll notice that the epoxy will start to seep down and out of the belly hole. Keep working it for 15 to 30 seconds until most of the epoxy has drained into the thru-wire hole, now pull it out slowly through the tail of the plug. You’ve now coated all or most of the inside of the plug with epoxy and after that cures, no water will get into that wood. Now use the small stick to slather the inside of the hook hole with a little more epoxy and press the belly grommet back in while the epoxy is still wet. The last step is to dip your gloved finger into a little more epoxy and then work it into the surface cracks. Depending on the severity of the cracks you might have to do this several times to get the epoxy to flow in and fill the cracks. If the splitting is really bad you may want to use a vise or clamp to squeeze the cracks shut while the epoxy cures—the epoxy will double as glue to hold things together.
When you feel that you’ve worked the epoxy into the cracks thoroughly, hang the plug up for at least a few hours and watch the tail end of the plug for drips, if you see one, remove it with a paper towel. After a minimum of 24 hours, you should be able to handle the plug without sticking to it. Unfortunately you won’t be able to recycle the thru-wire so you’ll have to go online and order some pre-bent wires (look up plug building supplies online). Thread the wire back through the components you removed, twist a new tail loop and you’re ready to reattach your hooks and go fishing. The average cost of a wooden plug these days is about $25, this repair will cost you next to nothing; the smallest epoxy kits cost about $10 and you’ll have enough there to repair more than 20 plugs. The stuff also comes in handy for clear-coating beat up plugs or reinforcing your mojo wood plugs—but that’s a subject for another story. Rescue your $25 and save your frustration, this is easy stuff.


Very sharp !!!
↓Gotta love some good ol ingenuity..
Great Tutorial! Thank You
↓Nice one thanks!
↓You’ve got too much time on your hands. Just return it. B
↓Well done. I like how you get to the inside too
↓I will never complain about the cost of the plugs, as I didn’t know the full story of needing to apply sealant thoroughly to keep them from splitting.
↓This seems common with maple? I try to at least line the crack with zap a gap. Not sure it helps or not.
↓